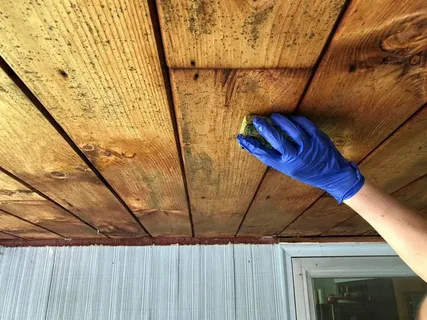
Mold on wood surfaces can be both unsightly and harmful. Not only does it damage the wood, but mold can also pose health risks, especially for those with allergies or respiratory issues. This guide will walk you through how to safely and effectively remove mold from wood, whether you choose to do it yourself or hire a professional. It also includes tips on preventing mold in the future.
Why Mold Grows on Wood
Mold thrives on wood because it’s a natural, porous material that absorbs moisture. When wood gets damp or stays in humid areas, mold spores can grow and spread quickly. Mold on wood can appear in different colors—often black, green, or white—and may release a musty odor. High humidity, water leaks, and poor ventilation all contribute to mold growth on wood.
Safety First: Prepare for Mold Removal
Before starting, gather the right equipment to protect yourself from mold exposure. Mold can cause skin irritation and respiratory problems, so it’s important to be safe.
- Wear protective gear: Use gloves, goggles, and a mask to protect yourself from mold spores.
- Ventilate the area: Open windows or doors to let fresh air flow. This reduces mold spore spread and removes any fumes from cleaning products.
- Contain the mold: If you’re cleaning in a large area, consider taping plastic sheets around the workspace to keep mold spores from spreading.
Cost of Mold Removal: DIY vs. Professional
Removing mold can vary in cost depending on how you handle it. Here’s a detailed look at the expenses for both DIY and professional approaches:
| Category | DIY Mold Removal | Professional Mold Removal |
|---|---|---|
| Essentials |
|
|
| Protective Gear |
|
|
| Preparation |
|
|
| Typical Costs |
|
|
| Effectiveness |
|
|
| Accessories Needed |
|
|
| Aftercare Options |
|
|
| Pros |
|
|
| Cons |
|
|
DIY Methods: Remove Mold from Wood Using Household Supplies
For small, manageable mold spots, DIY methods can be effective. Here’s how to use common household supplies to remove mold from wood.
- Vinegar Method: Pour white vinegar into a spray bottle and spray directly onto the moldy area. Let it sit for one hour, then scrub with a soft brush. Wipe away any residue with a damp cloth.
- Baking Soda and Water: Mix a tablespoon of baking soda with water to make a paste. Apply it to the mold, scrub with a brush, and wipe it down. Baking soda also helps prevent mold from coming back.
- Hydrogen Peroxide: Use 3% hydrogen peroxide, spray it on the moldy area, and let it sit for 10 minutes. Scrub with a brush, then wipe with a damp cloth.
DIY methods are budget-friendly and can work well for small mold patches. However, for deeper or larger mold issues, it’s often better to seek professional help.
Top Commercial Mold Removal Products for Wood
If household items aren’t enough, there are stronger commercial products made for mold removal. Look for mold removers specifically labeled for wood surfaces. These products may contain ingredients like bleach or other cleaning agents designed to penetrate and kill mold more effectively. They typically cost around $10 to $30 per bottle and are available at most home improvement stores.
Professionals recommend following the instructions carefully and testing on a small area first, as strong chemicals can sometimes damage wood.
Step-by-Step Guide: Removing Mold from Wood
Follow these steps to safely remove mold from wood:
- Prepare the Area: Put on safety gear and ensure proper ventilation.
- Apply the Cleaning Solution: Choose either a DIY solution or a commercial product, and spray or apply it to the moldy area.
- Scrub the Area: Use a soft-bristled brush to scrub the mold gently. Be careful not to damage the wood.
- Wipe Away Residue: After scrubbing, wipe down the area with a damp cloth to remove any leftover cleaning solution and mold.
- Dry the Area: Use fans or dehumidifiers to help dry the wood quickly, as moisture can lead to mold regrowth.
When to Call in the Professionals
If you notice large patches of mold, especially if it’s deeper than the surface, it’s best to contact professionals. They have the tools, knowledge, and experience to handle significant mold problems effectively. They can also ensure that mold does not return by addressing the underlying moisture issues.
Conclusion: Keeping Your Wood Mold-Free
Removing mold from wood is important for both the health of your home and your family. Whether you choose a DIY method or professional help, being proactive can prevent mold from becoming a bigger issue. Always address moisture problems promptly and keep your home well-ventilated to minimize the chances of mold returning.
By understanding your options and following the right steps, you can maintain your wood surfaces and ensure a healthy living environment.

